Monday, December 29, 2014

New World Lamp comes in white

Now New World Lamp come in color white


It's a lot more than just color change, the lamp shell is better constructed with thicker (4mm vs 2.5mm) Coroplast , hence stronger lamp body.

The lamp shell is better designed, only requires 4 plastic latching screws. The rest of lamp body is self locking. It's easier to integrate LED modules and driver with lamp right now.
Other than Lamp body change, the light emitting unit remains the same. Still using same reliable LED modules and driver, output 32Watt, 2500 lumen of daylight white, the same light output as before.
This world lamp is being sold at easyledlighting.com for only $49.

Wednesday, September 17, 2014

Example of Garage ceiling light

A customer sent us his installation example:
(LED retrofit kit and film diffuser can be purchased at easyledlighting.com)

What I wanted is to light up our garage as my workspace. The garage has bare wood studs roof but doesn't have light bulb base installed. What I want is something easy to install, bright enough low maintenance and not cost a lot.  

1) mount LED driver and LED modules between roof studs.

   Use screws to mount LED driver to wood stud, and using longer nail to mount LED module loosely and away from roof panel, so that the back of module won't be covered and air is still good to ventilate all around the module bracket, which double as heat sink.
At first, I use the diffuser film that designed for the module. The LED module and diffuser together is very light in weight (about 2 Oz), so I can  hang the module on the end of two long nails and it stays there.

2) Tidy up the wires, connect the power and the modules will just light up.
From the power plug, AC wire to LED driver is running on home AC, make sure you follow building electrical code for that 1 pair of wires.  After LED driver, the wires to connect each LED module are all running on low voltage DC. (The kit I purchased is 24V DC), therefore we can go easy on the wiring. After the wiring done and plug into wall socket, all LED modules light up instantly. But once the round shape diffuser is used, the light goes out at all direction and I realized I shouldn't install LED module between wood studs.

3) I purchased acrylic diffuser panel from HomeDepot (at lighting section, near florescent lamps), I cut into suitable size to cover space between wood studs, use drill to pre-drill screw holes. (can't nail or screw on acrylic panel directly)

4) Remove the diffuser film, mount the diffuser panel on wood studs to cover LED module. I have the diffuser panel cut to 16" long so there are at least 3" more diffuser coverage over both sides of  LED module. Screw them to wood studs.
5) Light up, the light is very bright and it looks neat from below.  Winter is coming and this LED set can withhold -20F, which I don't think it would get this cold indoor.


Friday, August 29, 2014

A peek review with our next generation World Lamp

We are making our next generation World Lamp shell. What shows in this photo is a prototype of 2.5mm coroplast, the real deal will be made with 4mm coroplast, which is much stronger than existing lamp shell.
We moved its opening to top of lamp, and use tab insert instead of snap lock to latch the cover pan.
Everything else remain the same, you still get a nice 30 watt LED core to shine through exactly the same dual lamp windows. The only thing that's going to change is color. Which color should we pick?


Monday, August 18, 2014

New Packaging of World Lamp

Our World Lamps have been our best selling item, but it had been always packed in 4 lamps package. The long box packs 4 lamp shells, and 4 smaller boxes hold one light unit each. Then the whole package is shrink wrapped in thick plastic cover to be water repelled. This is nice but anyone buys World lamp have to get 4; no change. Package come in just 8 lbs.

 Recently we found USPS provides this 37" triangle shipping tube for free if you ship priority. So we decided that would help our business to provide some flexibility. We split the box of 4 lamps into two priority shipping tubes, and our customer now can order 2 lamps at almost half of price of 4 lamp pack.
The 2 lamp pack come in under 4 lbs.

Wednesday, August 6, 2014

Mount Easy LED module to wood frame

The main enemy for high power LED is heat. Our special design quickly dissipates heat from tiny LED chip to large area metal mounting plate; but the end game is still to spread heat out of this module to its surrounding, air in most cases.

If the application is to attach LED module to metal lamp case, then heat dissipation won't be a problem at all. So is to set it by itself that both sides of plate exposed to free air.

However, it's common desire that we want to attach this module to wood frame, which is easy mounting. The bad thing about it is that: Wood dissipates heat slowly, by attaching one side of LED module plate to wood, it's like cover 50% of heat sink area to stop heat transfer to air. That's bad and what can we do if we have to?

     Keep Air Flow
Below is an example how I attach our module to wood frame. I use screw nuts as spacer to keep air still get in touch with both sides of metal plate. Also it would be wise to mount the module to an airy location to keep cool. The result is good enough to sustain heat dissipation.

Wednesday, July 23, 2014

What do you think of this LED Wall box light?

Our latest design: Easy LED Box light.
This is a Wall mount low cost utility light box like picture shown at below.
 

Tradditional Wall mount box light use fluorescent tubes in utility light box.
This one is about 4' long and use 70 Watt of Power.
 

Our Prototype LED box light is 28" long, prototype made with one piece of corrugated paper and diffuser film. The light is consist of two Easy LED module with mounting hardware. Liht output is 32Watt, mostly point toward at below where needed. The structure is extremely simple
 
There are two piece of Easy LED modules mounted on a bracket, with driver at middle.
module is bent to point light output at 45 degree below; and made small wedges at top for easy insertion of lamp cover box
The box is extremely simple as well, diffuser film at front opening and another opening
at back for hang at top of module assembly
 
All you need to do is to install the light module assembly to Wall electricity box, connect the wires.
Then put light box cover on to the light module assembly, it just hang by gravity and its edge will
 
snag fit in between wall and the module plates. Then the light is ready for use
 

Any comment? We want to hear from you. You can comment in blog or write us at easyledlighting@gmail.com

Friday, July 11, 2014

LED panel Light

LED panel light is a flat panel that generates soft uniform LED light output. It usually come in with area size compatible to fluorescent Troffer ceiling light.  Unlike troffer lamp, LED panel lamp usually thick within 2" vs 5" thick of troffer lamp.
There are two ways to build LED panel light.
One way is to use multiple smaller LED to setup a matrix to make evenly light area light source. With no or little diffuser panel, an area panel can emit light evenly. This method requires circuit running at entire panel area, so it suits smaller panel better.


The other method is to set powerful LED light source at edge of panel, then place special light diffuser plate at entire area. This diffuser panel has special cuts and groves to make light through it distributed evenly. This way, the costly LED circuit won't be very large, more suitable for larger panel. However, this kind of diffuser plate won't be very thin and weights a little bit, and a reflective film at back to make sure light only come out at front. Since some light output is reflective light, so its usable lux per wattage is lower than other directional LED light applications.


Wednesday, July 9, 2014

Easy LED introduces new low 2015 price right now

It's just summer of 2014 right now; yet Easy LED Lighting has introduced its new low 2015 price. Compare to 2014 price, the prices are about 15% lower.
LED lighting uses less energy, generates less heat and last much longer
Their products include new style LED shoplight, LED converting kit.


LED product can be view at http://www.easyLEDlighting.com


Monday, April 28, 2014

LED Lamp can be even more pretty

I met this artist Holly Peters, she has a thing about making things more beautiful. By looking at photo at our Kickstarter project, she had few ideas about making our lamp more pretty from a already distinctive looking lamp  such as:


So we met and I gave her a set of our World Lamp. This is the result of her work.

She did some paper carving and painting and put those small decorative item on the lamp shell, and that look nice.


But wait, that's not all. Wait till we turn on the light:


The aquarium scene of Under the Sea is more attractive with our blue lamp shell, nice.

How about your own design? For sure you can come out something is even more nicer.

Tuesday, April 8, 2014

Summer is coming, another reason to switch to LED lighting

Did you hear the true story happened in Europe after they banned selling of incandescent light bulb?    One guy put out ads to sell 100 Watt incandescent bulb and it was completely legal. How come? His ads reads "Electrical Heating Device". The Ads can't be more true, traditional incandescent bulb converts 5% energy into light; and 95% of energy into heat, quite a efficiency heating device.  
You may or may not know this: all your lighting device has a common byproduct that is heat.
At winter time, that's not a problem at all. just burning a little bit more electricity. At summer time, the heat can be quite annoying.
For example, My kitchen was using 4 T8 tubes in ceiling light, that's 140 watt of heat and light in total; but ultimately everything would come down to heat.  Later on I convert the light using 4 LED modules and that was 60 Watt. Weeks later, I feel the light is too much and took out one module and re-arrange the positions and that become 45Watts and I feel the light is just right. By doing so, I also trim off over 90 watt in heat. If we had to move energy using AC, we have to use more energy. That's quite an effort for Air Conditioner to move out during summer time.

LED light not only use less energy to light up, at summer time, it also require less AC effort to remain coolness.  That's double saving.

EasyLEDLighting.com has many LED Lighting products of choice.

Friday, April 4, 2014

Should lamp weight a lot? (Earthquake safety)

Last week LA was hit by a magnitude 5.1 earthquake, we were just glade no one was killed or serious injured, then this week Chile was shook by a magnitude 8.2 earthquake. Thanks to strict building code, only few were killed in this earthquake despite its super strength.

I remember watching a video of simulated earthquake, everything was shacking, especial the hanging shop light style lamp in the middle of room. It started moving back and forth, suddenly one chain that leash one side of lamp broke, and the lamp just swam though the room, like a knife hang by its end, then fall on floor, smash into piece. Of course, that was a fluorescent shop light with glass tubes. With the power of simulated earthquake keep increasing, eventually cabinet, bookshelf all fall, making bigger mess; but I remember the lamp fixture was first one that broke out of control.

Why? a typical 4' long T8 fluorescent shop light weights nearly 10lbs, and they are hang high by two thin chains which give it waggle room to work on the damage. And after it fall, shattered glass can further do more damages.

Look at the traditional shop light design, sheet metal lamp shell, metal box ballast, long glass tubes, sounds like a trouble prone combination. and no wonder it has to weight so much. Do we really have to have all that to make light?
Here is our answer to that. Our World Lamp LED shop light is a 36" long shop light that illuminate as good as a 4 feet long two T8 fluorescent tube. Yet our lamp only weights 1 lb 10 oz. It can be hang by two small nails or thin chain/wires.

Illustration: World Lamp shop light hang by two thin metal wires
 And the lamp is made by safe material; it doesn't contain glass, mercury or any other dangerous material. Even when it does fall from high space, it wouldn't do much harm.
This is a nice lamp, low cost as lower than $50 per lamp. The price near a traditional fluorescent shop light , but it's LED light source, use about half of energy and will last much longer.


World Lamp is available at EasyLEDlighting.com

Sunday, March 30, 2014

Example of convert Fluorescent lamp to LED lamp

Here is an example how I convert a fluorescent ceiling lamp into LED lamp. To decide if a lamp can use Easy LED module for conversion, there are couple of things we should be looking into.
First, Easy LED module is about 9" long and 3 inch wide. We can decide where and how many modules to be fitted into lamp case. Some lamps could use two, some lamps could fit 3 or more modules. In this example, we choose two modules for the size of lamp and light output. The second thing we want to check out is whether it has proper diffuser and the diffuser should be placed at least 4" away from light source.

The lamp of target a 14" square lamp, it uses 2 round fluorescent tubes of 32W and 22W, totally 54W, and the Easy LED kit I use is 30Watt Easy LED kit to replace the light source.

32W + 22W fluorescent tubes


To install, the first step is to remove fluorescent tubes and the ballast, we only need the power feed. The ballast can be removed by losing two screws, and the metal hooks can be removed by moving them back and forth several times then pull off.

Second step is to mount Easy LED modules and driver on the lamp base. I mount the module at symmetric far side location and mount the driver in the middle for balance of weight and light output. Make sure you leave the lamp base mounting screw holes uncovered. The lamp base is clean and smooth, I use attached double sided tape to fasten the modules and driver; however the lamp base is somewhat soft and twist-able (wobble) , so I also use included mounting screw to enforce the mounting (use 7/64" drill bit to drill a pilot hole first, the the screw can be easily screwed in ), I only need one screw per module.


Once modules and driver are mounted, follow the link to connect the wires, put the diffuser cover back on. The conversion is then completed, it took me less than 20 minutes. Now this lamp only cost about half of energy to run and the 30 Watt LED lamp is brighter than existing 54 Watt fluorescent tubes for this lamp. And I don't think I will be needing a ladder for replacing burn tube for a long long time.


30 Watt Easy LED kit is available at www.easyledlighting.com for sale with $39.
Typical LED ceiling Lamp would run at $90.

Friday, March 28, 2014

Purpose of diffuser

The purpose of diffuser in a lamp is to soften light output for soft viewing, which is especially important for LED light. LED is a point light source that can emit a lot of light. Fluorescent light tube in this area is a lot of better since its light come out from a long, although narrow area. In some cases fluorescent tube can be view with naked eye.
LED light, on the other hand is another story. Even a LED tube with 300~400 small LED doesn't look very comfortable by eyes. Direct view into our 5Watt LED can hurt our eyes. Unless the lamp is a reflectional design, a diffuser of some kind is needed.

The work of diffuser is to break down intensive output light into random directions, of course much less intense. A point light source would look like light is coming from all directions, hence, looks like from entire area.
There are two type of diffuser design, one use translucent type, the material itself is not complete clear. Its particle absorb light and emit light at all directions. 
The other one is clear type, use its shape to redirect light. the finer its shape, the better it diffuses.

Diffuser panel at 2'x4' size can be found at Home Depot or other home improvement store, these panels can be used as direct drop in for a 2'x4' Troffer lamp.
Our LED module has optional integrated thin film diffuser.  The film is about 0.7mm thick, basically clear film with micro structure at surface.


Click to see how to install thin film diffuser.

Wednesday, March 19, 2014

LED Lighting Product Quality

What's should we be looking at LED lighting product for quality?

* Color Temperature and Color Rendering Index (Quality of light)
    Like CFL/Fluorescent light, LED light is not a full spectrum light (vs incandescent light). Early LED light products usually look bluish at around 6500K, for its high lumen efficacy number. Recent years there are more day light white (5500K) and warm white (below 3000K) products which are more suitable to human visible range.
    Color Rendering Index (CRI) is the number in percentage to measure how good the ability of light to bring out true color of objects, Incandescent light bulb is highest as 100. Usually you want the number to be greater than 70 for most applications, professional who works with color would require 90 or higher CRI.
* Heat Handling (Quality for product life time)
   Almost all electronic parts emits some heat, that is especially true for LED products. Lighting grade LED converts about less than 33% of energy into light; the rest would become heat. Driver does better that has only less than 20% of energy become heat. The number is better than traditional light source such as incandescent, fluorescent or HID. However, traditional light sources work at much higher temperature above 400F(200C) or higher; on this end, electronic parts usually won't be able to sustain more than 250F(120C). That's why LED lighting is more sensitive to heat. Heat can damage LED, shorten their life span, decrease light output and ruin their CRI.  Similar effect applies to driver, too.
    Thermo design is big topic in LED lighting since beginning. It's complicated and no fixed rule for user to exam products. One general rule is metal conduct heat better than most of other materials; the other rule is size counts. lots of heat trap in a small space isn't a good thing.
* Energy efficiency
    There are some room of difference in energy conversion rate among various LED products. Since lumen is measured as energy, blue light has higher lumen number than other light. LED working temperature also plays a role, too. Cooler LED does better work to convert electricity into light. Of course, circuit efficiency made few difference, too.

    All these variance doesn't compare to difference made by basic lamp design. LED by nature is directional light source, while all other light source is omnidirectional. Use LED to make a omnidirectional lamp requires mounting LED at different directions.  
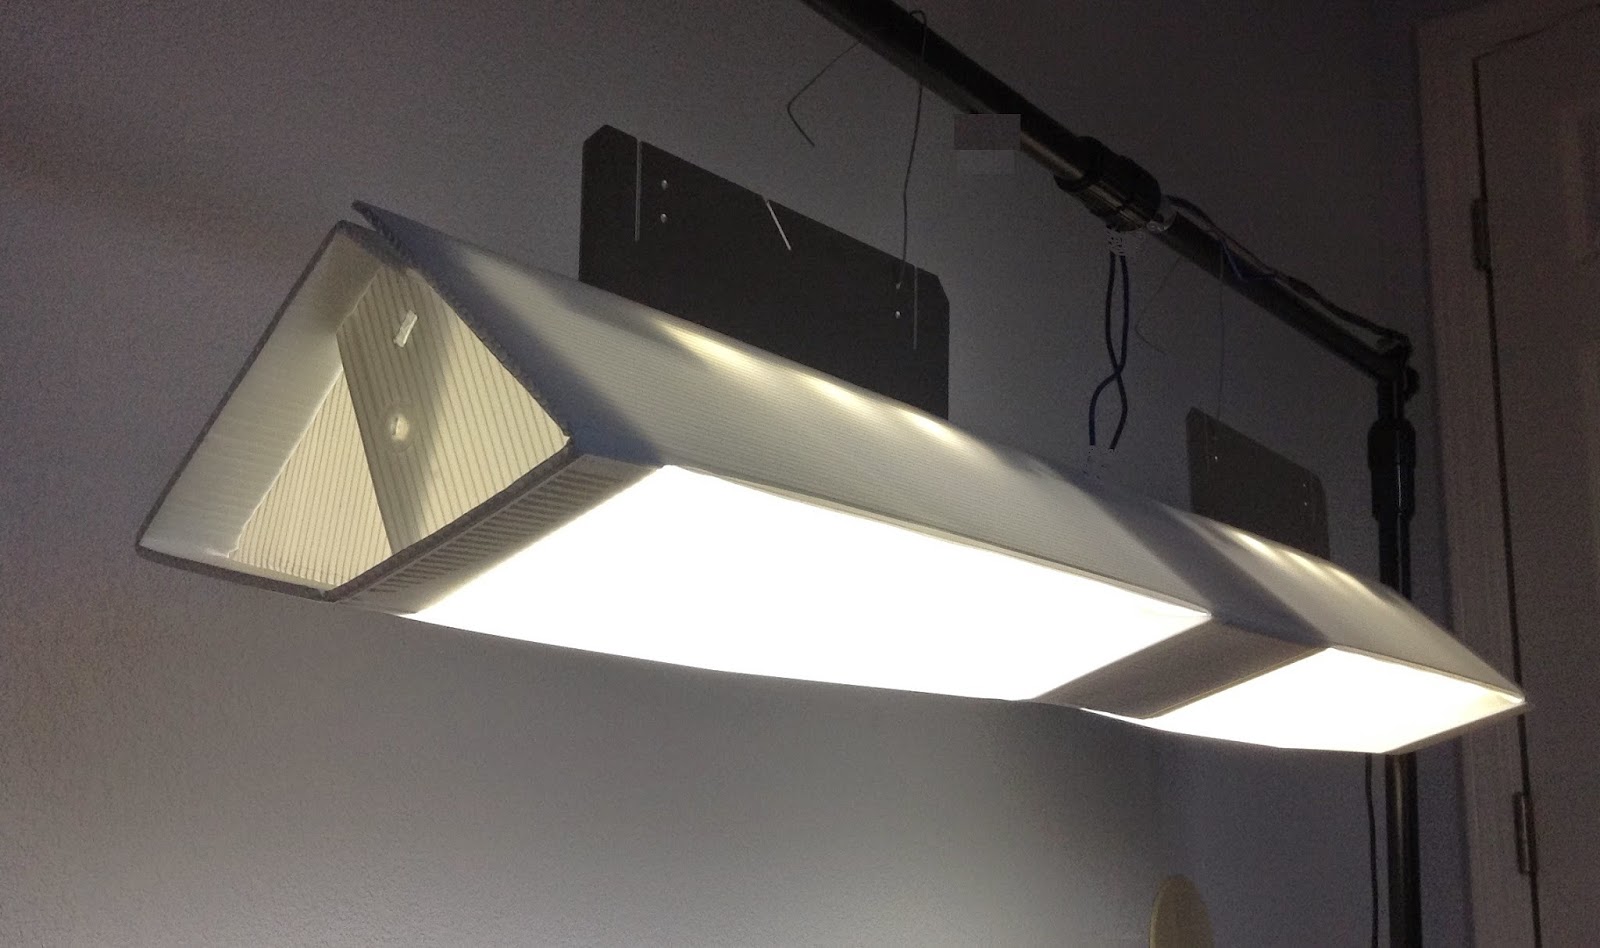
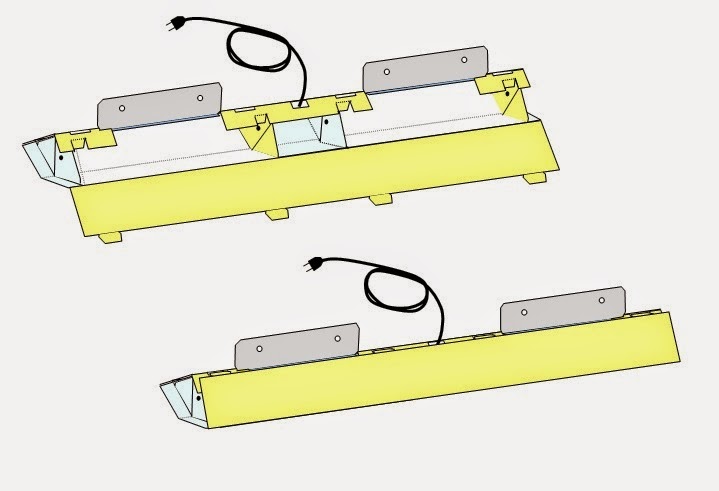
On the other hand, use other light sources to make a directional lamp, such as ceiling light/Wall light/ shop light, usually include reflective panel to reflect light to desired direction. But no matter how it does, there is no match to directional lamp that uses LED. in some cases, directional LED lamps use only half of energy as fluorescent ones.


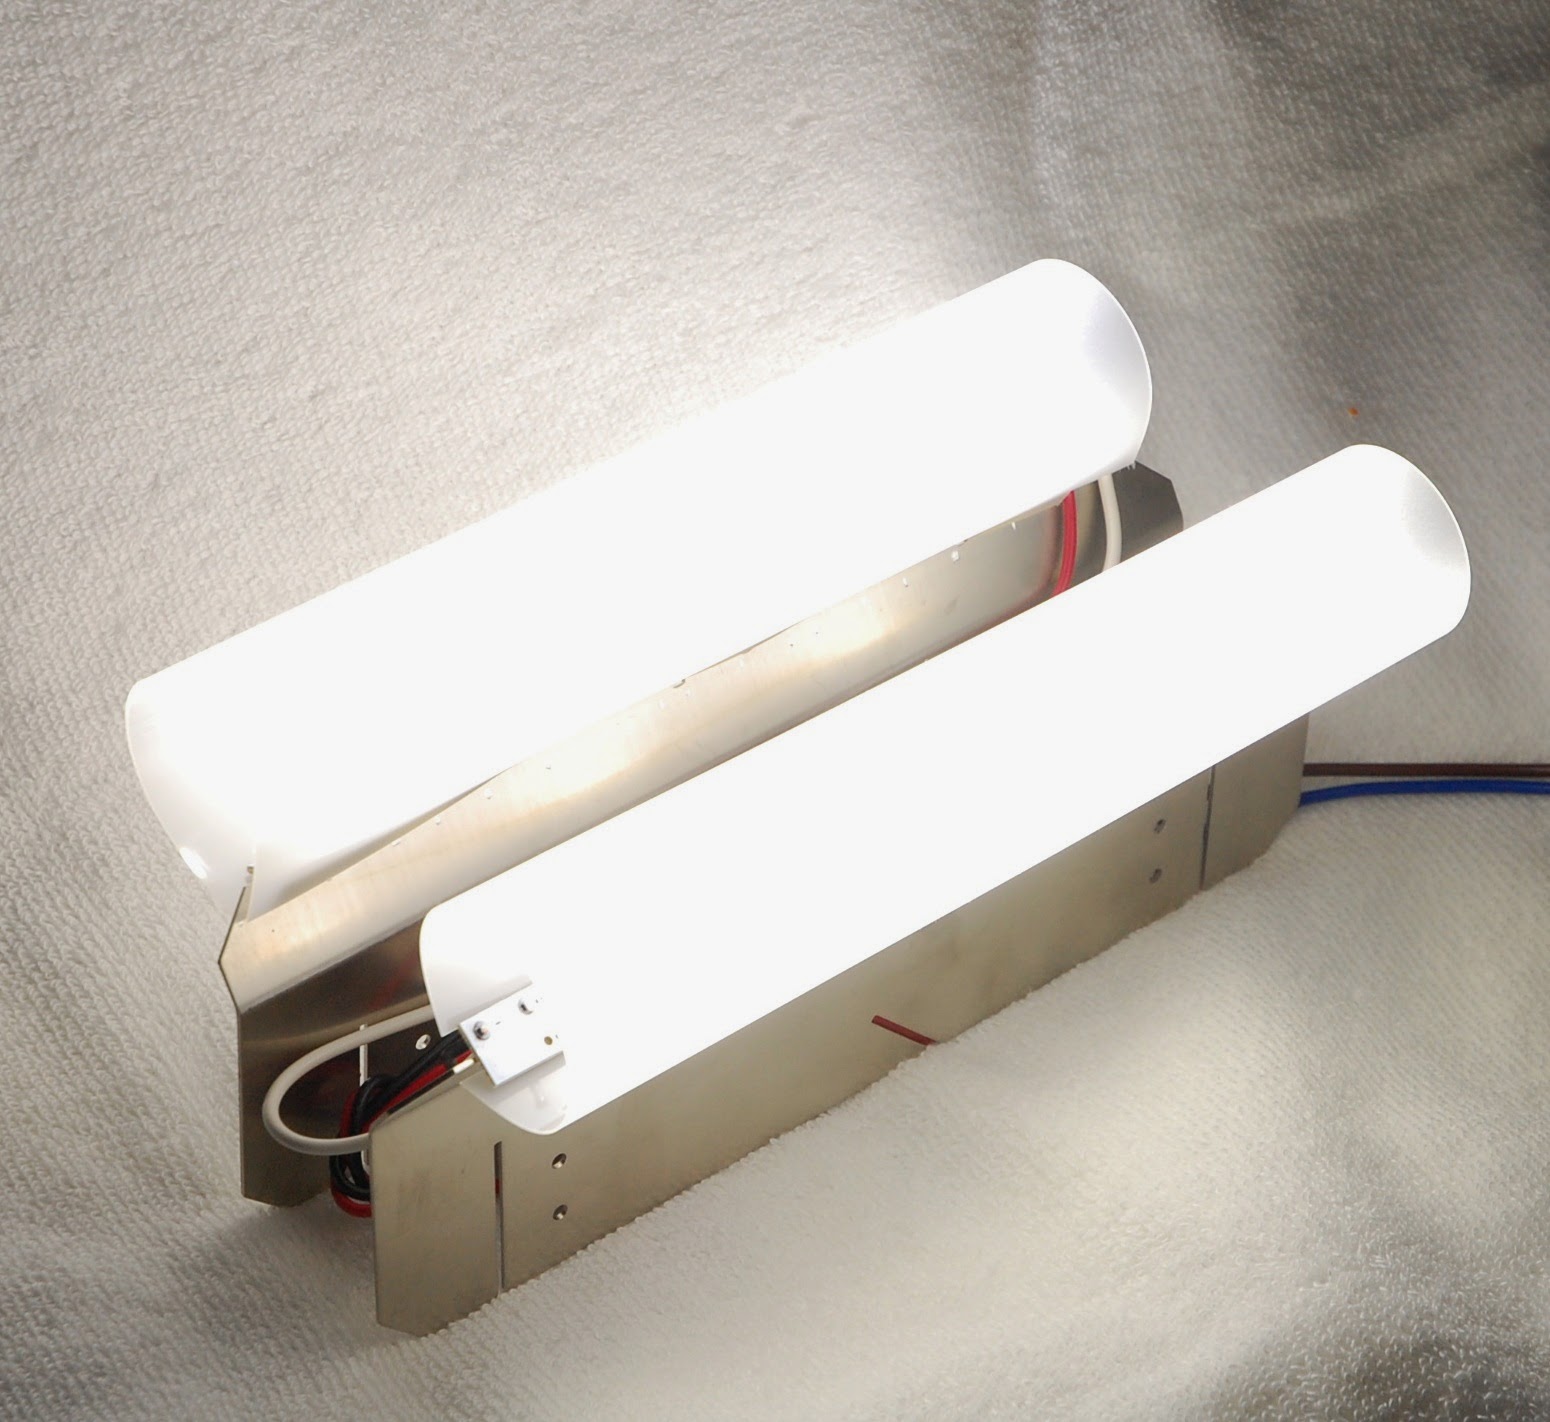
Easy LED Lighting quality

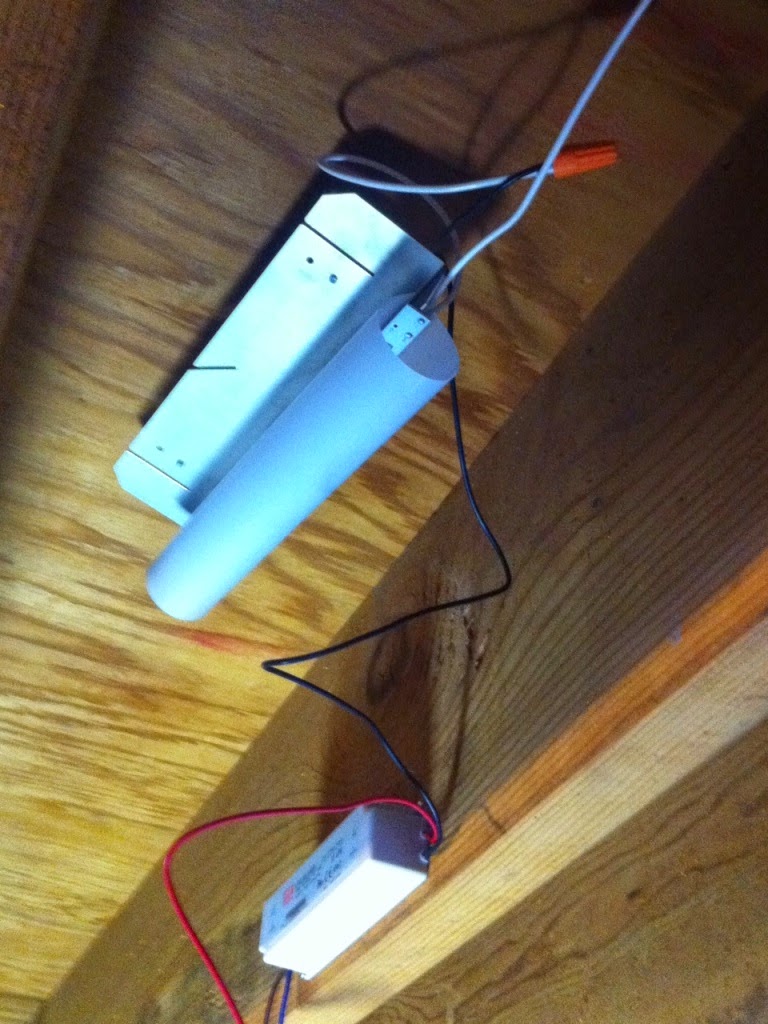
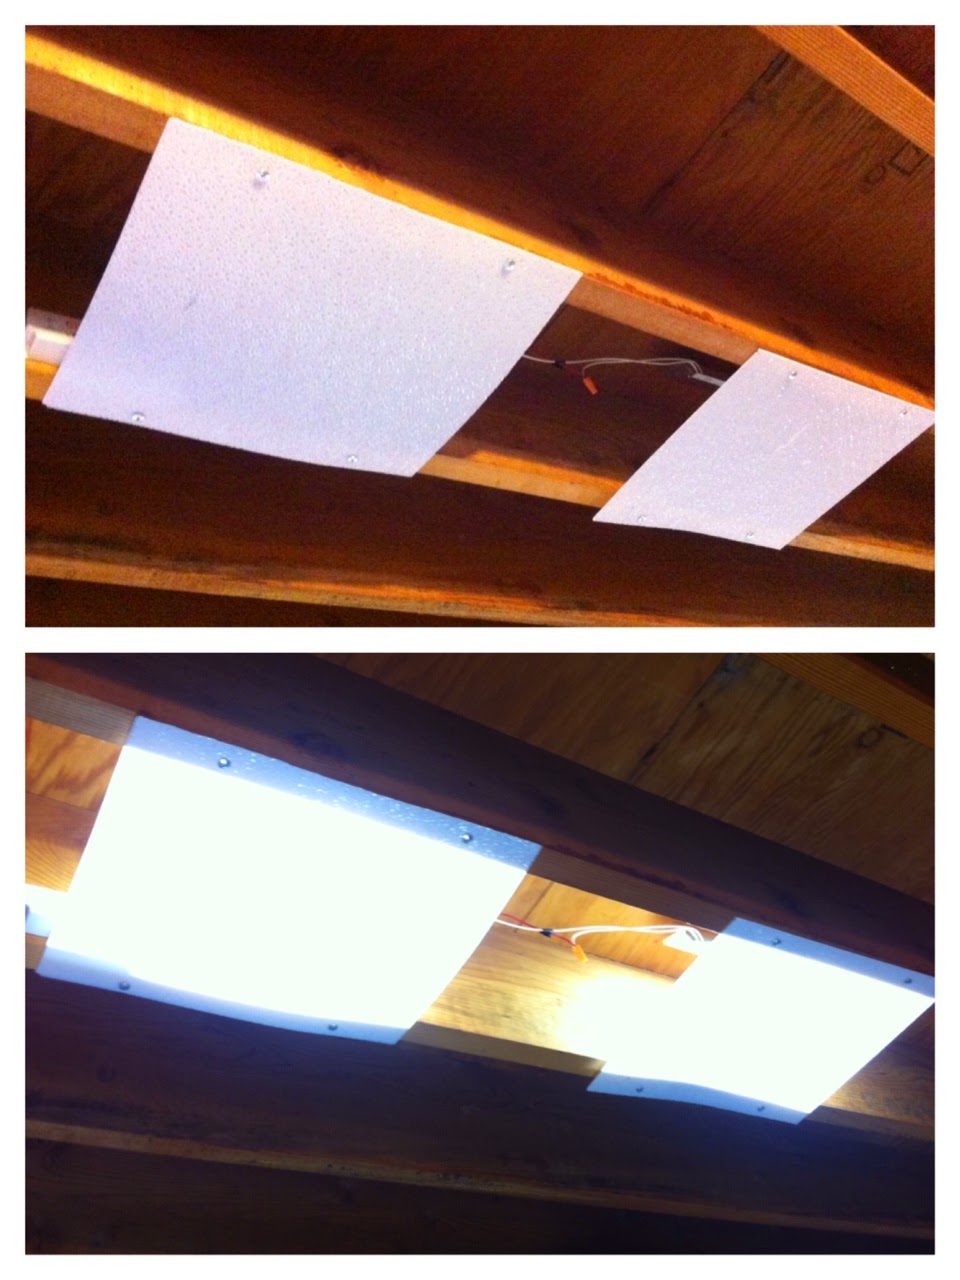
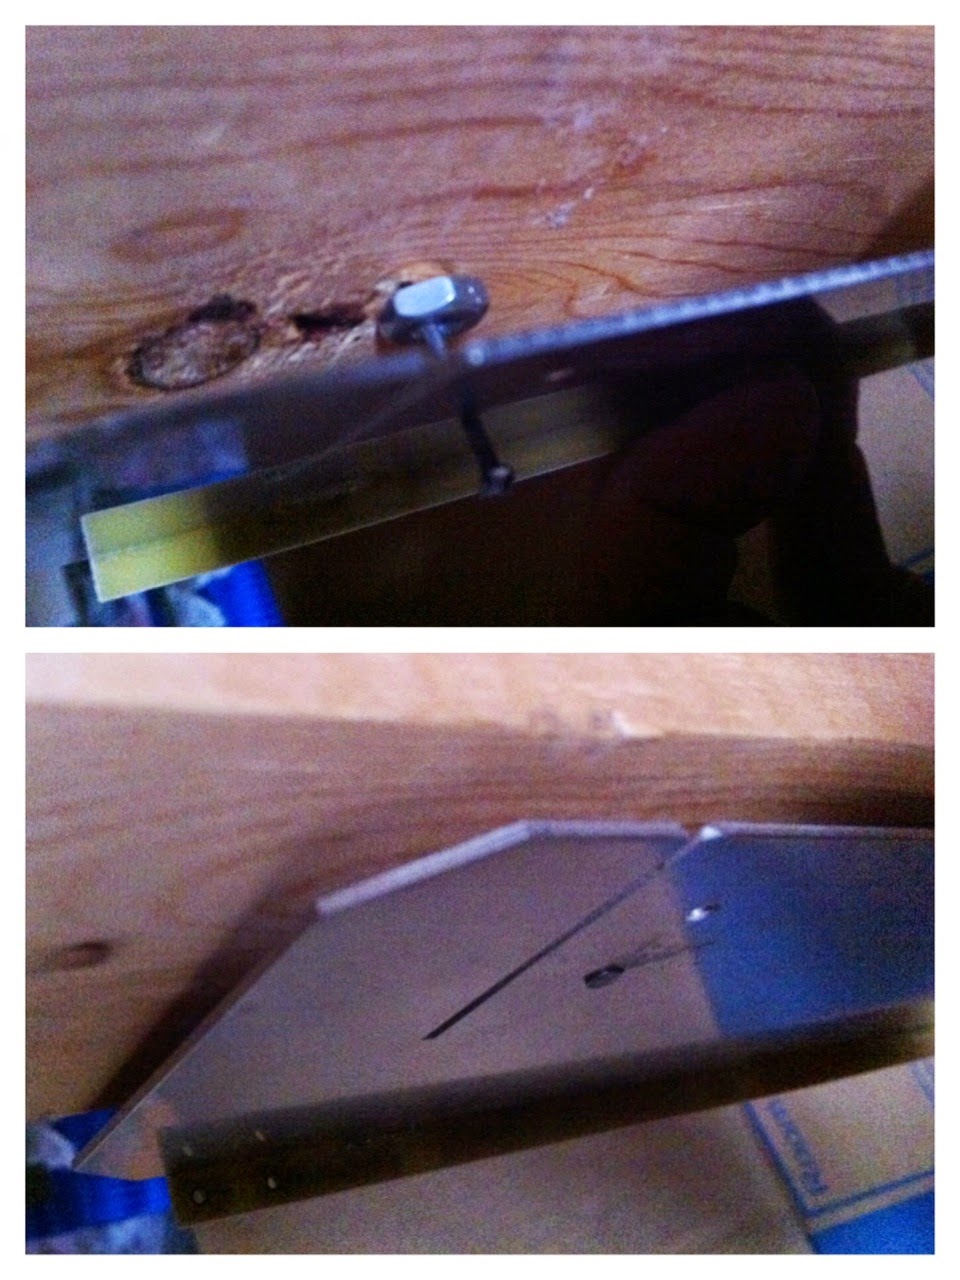
Our LED module uses aluminum plate as mounting bracket, which also makes direct contact with the belly of all LEDs.  The aluminum takes heat away from LED and allow them to work at much cooler temperature.
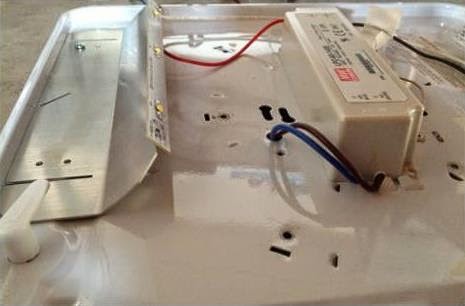
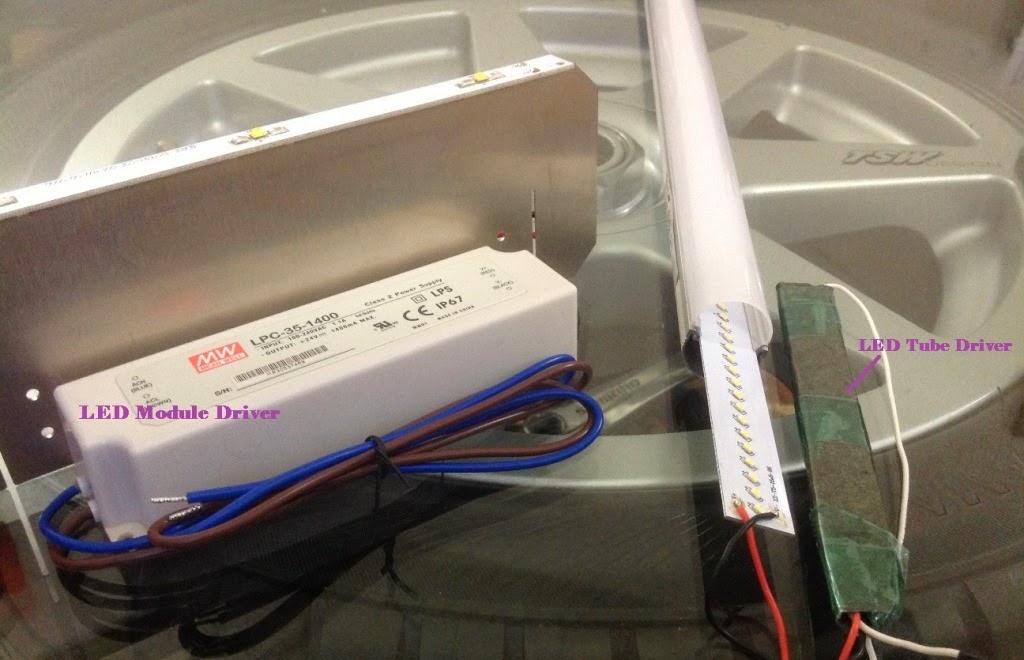
Our LED kit or lamp uses external driver that has much durable design. It's water and dust proof and doesn't have to be crumble together LED heat source.

Monday, March 17, 2014

LED tube demystify


LED tube is a newly emerging product from China. They typically have aluminum back half tube, diffuser from tube cover, LED PCB and driver circuit. The whole thing is packed inside a narrow long tube that has less than an inch in diameter, compatible size as fluorescent tube in order to retrofit. LED tube usually use many small low power LED, typical hundreds of them. Because the distance between LED and diffuser is less than half inch, to make the light output look uniform, the distance between LEDs should be less than that too.  Depends on the design, a typical 4 foot long T8 LED tube uses 18W ~ 22 Watt of power, is less than average 32 Watt used by fluorescent tube to achieve same brightness..


Although the goal was to retrofit into existing fluorescent light fixture, there is a ballast between household AC and fluorescent tube connectors to reduce current in  fluorescent system. Install LED tubes into fluorescent fixture need to bypass this ballast, and there are two kinds of LED tube standards that's not compatible with each other. Mix use these two may cause catastrophic damage and dangerous. Therefore remove or bypass the fluorescent ballast is considered invalidation UL warranty.   

Put that aside, diver used in LED tube has to be crumple inside a tiny space that's less than half of tube. So their design is usually delicate. Since both of LED board and driver generate great deal of heat in such a close proximity, they affect each other in many aspects. There are reports about poor lifetime of driver and color degeneration of LED at near the driver.   

On the contrary, Easy LED kit or lamp use external driver with good safety and quality, and our module handles heat excellently, we believe is a much better choice than LED tubes. Easy LED kits and Lamps can be get at easyledlighting.com

Friday, March 14, 2014

Is it easy to install Easy LED kit?


My kitchen, about the size of 14x10',  has build-in ceiling light that was using fluorescent tubes. There were 4 four feet long T5 tubes that were installed inside the 11" ceiling space and were using totally 120 Watt of power when turn on.
Fluorescent tubes has a shorter life span and it was really a hassle to replace a 4 feet long glass tube. As I started this LED business, my first order was to replace this ceiling light.

This ceiling light is actually very simple with 2x2' diffuser panels. The diffuser panel can be easily push up and move to the side to reveal access space for works like replace fluorescent tubes.

To install Easy LED kit,  The first step is to remove all fluorescent tubes and find the power feed. I did not remove the old fluorescent lamp base; I just leave them in there to reduce the junk I had to remove for this project. But it's a good idea to disconnect the old ballast from power feed as the ballast would still consume a little bit of power despite tube is removed.

The second step is to install LED modules at proper locations. Our standard modules are pre-bent to 90 degrees and pre-wired. So the location of the modules are determined by wire connectivity. Handle module via its metal bracket; DO NOT touch the LED balls. Remember the LED driver need to be placed near the power feed, and the rest of modules should just follow the wires to deploy. Modules are installed flat side against ceiling so the LED are facing downward.

To install them to a clean and flat surface, we can just use its back double sided type to stick to surface, remember to push it really hard (pressure) against the surface and allow dwell time (1 hour) to let the adhesion to set before turn on the light.

On a not so clean surface such as old dry wall surface, use included screws to enhance fastening. When I install them on dry wall, I don't even need to pre-drill hole, just push it into the dry wall. And I only use one screw per module.  

Once those modules are set and wires are arranged. the next step is to connect the wiring, just follow this link to connect them.

The whole installation was very easy and didn't take much time. At end, just make sure the lights are working before we close the diffuser panels. Once that was done, just enjoy the very bright and energy efficient LED light.

I used 4 modules that consumes 60 Watt of power, which is only half as before. But then my kitchen is already the brightest room in my house.

4 modules Easy LED kit is on sale at easyledlighting.comfor less than $70


Wednesday, March 12, 2014

LED grow light project

There has been interests about using LED light to grow plants indoor. There are also question about whether our light spectrum is suitable to grow plant. To put these arguments to stop, I have conduct a test to find out all the answers. I put two strawberry plants inside a closure space of Old TV cabinet. When door closed, there is absolutely no other light can get into this cabinet, the only light source is one of our Easy LED module running at 15 Watt.

 I have a timer set to light up this cabinet 12 hours a day to simulate real sunlight also.

I did some reading about general grow light, there are article saying the light need to be above certain strength to enable plant for photosynthesis instead of respiration. Our LED module emits a lot of light for illumination, for people to see things. But there is no comparison to strength of sunlight, which some time can burn your skin, and we generally don't want that kind of light strength in our house either.

But the purpose here is to grow plant, we we can shorten the length between light source and plants. I initially set the LED module fixed at top of cabinet, which is 25" away from the plants. I use a Lux meter and got 800 lux reading. Then I use two thin strings to lower the module to 16" above the leaves, my Lux meter read 2500 lux.  Since our module is so light weight, about 2 oz, it can be easily hang at desired height.

A TV studio only need requires 1000 lux of light intensity.  2500 lux is compare-able to sunlight of a overcast day.

At shorter distance, the light is much intense, too bright for viewing with general indoor ambient light; but it's perfect for growing plant.


The project is still on going, those two strawberry have been inside the closed cabinet for over 10 days by now. By compare photos from beginning and now, I sense that both strawberry have been grow bigger, healthier, with just LED light.

10 days after project started
10 days after project started.

19 days after project started

Above photos shows 10 days/18 days after project started, the two strawberry looks bigger/taller and healthy; if the light doesn't work, these plant should be withered already.


You can order Easy LED kit at easyledlighting.com and specify LED modules to be unbent.