Sunday, March 30, 2014

Example of convert Fluorescent lamp to LED lamp

Here is an example how I convert a fluorescent ceiling lamp into LED lamp. To decide if a lamp can use Easy LED module for conversion, there are couple of things we should be looking into.
First, Easy LED module is about 9" long and 3 inch wide. We can decide where and how many modules to be fitted into lamp case. Some lamps could use two, some lamps could fit 3 or more modules. In this example, we choose two modules for the size of lamp and light output. The second thing we want to check out is whether it has proper diffuser and the diffuser should be placed at least 4" away from light source.

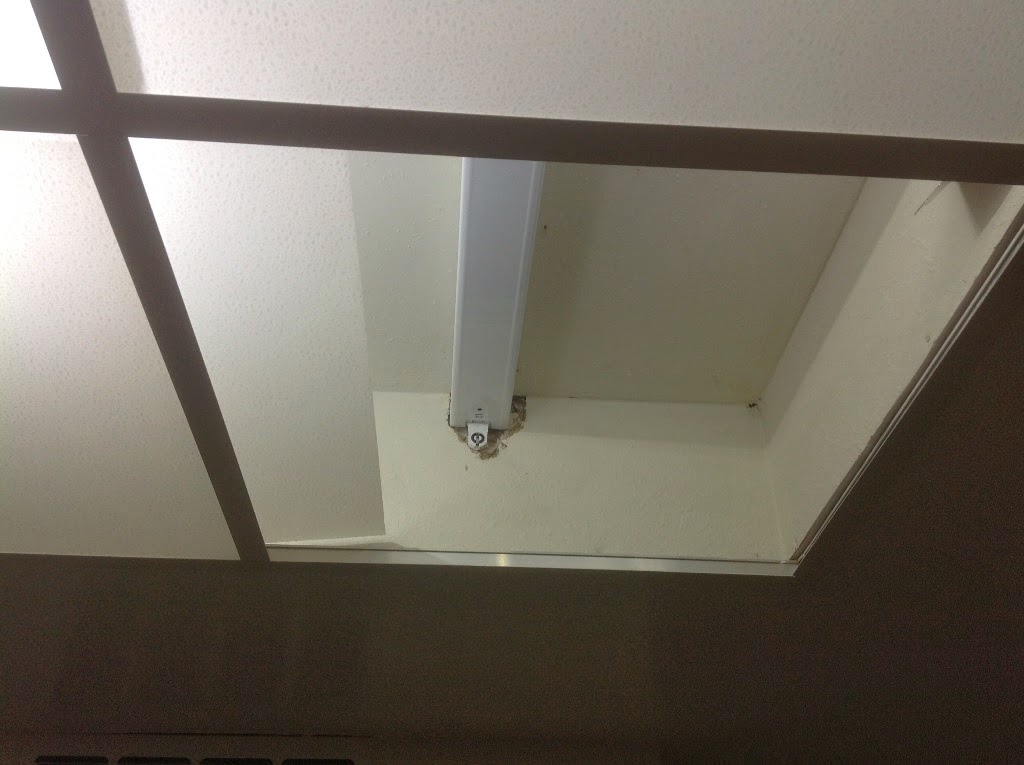
The lamp of target a 14" square lamp, it uses 2 round fluorescent tubes of 32W and 22W, totally 54W, and the Easy LED kit I use is 30Watt Easy LED kit to replace the light source.

32W + 22W fluorescent tubes


To install, the first step is to remove fluorescent tubes and the ballast, we only need the power feed. The ballast can be removed by losing two screws, and the metal hooks can be removed by moving them back and forth several times then pull off.

Second step is to mount Easy LED modules and driver on the lamp base. I mount the module at symmetric far side location and mount the driver in the middle for balance of weight and light output. Make sure you leave the lamp base mounting screw holes uncovered. The lamp base is clean and smooth, I use attached double sided tape to fasten the modules and driver; however the lamp base is somewhat soft and twist-able (wobble) , so I also use included mounting screw to enforce the mounting (use 7/64" drill bit to drill a pilot hole first, the the screw can be easily screwed in ), I only need one screw per module.


Once modules and driver are mounted, follow the link to connect the wires, put the diffuser cover back on. The conversion is then completed, it took me less than 20 minutes. Now this lamp only cost about half of energy to run and the 30 Watt LED lamp is brighter than existing 54 Watt fluorescent tubes for this lamp. And I don't think I will be needing a ladder for replacing burn tube for a long long time.


30 Watt Easy LED kit is available at www.easyledlighting.com for sale with $39.
Typical LED ceiling Lamp would run at $90.

Friday, March 28, 2014

Purpose of diffuser

The purpose of diffuser in a lamp is to soften light output for soft viewing, which is especially important for LED light. LED is a point light source that can emit a lot of light. Fluorescent light tube in this area is a lot of better since its light come out from a long, although narrow area. In some cases fluorescent tube can be view with naked eye.
LED light, on the other hand is another story. Even a LED tube with 300~400 small LED doesn't look very comfortable by eyes. Direct view into our 5Watt LED can hurt our eyes. Unless the lamp is a reflectional design, a diffuser of some kind is needed.

The work of diffuser is to break down intensive output light into random directions, of course much less intense. A point light source would look like light is coming from all directions, hence, looks like from entire area.
There are two type of diffuser design, one use translucent type, the material itself is not complete clear. Its particle absorb light and emit light at all directions. 
The other one is clear type, use its shape to redirect light. the finer its shape, the better it diffuses.

Diffuser panel at 2'x4' size can be found at Home Depot or other home improvement store, these panels can be used as direct drop in for a 2'x4' Troffer lamp.
Our LED module has optional integrated thin film diffuser.  The film is about 0.7mm thick, basically clear film with micro structure at surface.


Click to see how to install thin film diffuser.

Wednesday, March 19, 2014

LED Lighting Product Quality

What's should we be looking at LED lighting product for quality?

* Color Temperature and Color Rendering Index (Quality of light)
    Like CFL/Fluorescent light, LED light is not a full spectrum light (vs incandescent light). Early LED light products usually look bluish at around 6500K, for its high lumen efficacy number. Recent years there are more day light white (5500K) and warm white (below 3000K) products which are more suitable to human visible range.
    Color Rendering Index (CRI) is the number in percentage to measure how good the ability of light to bring out true color of objects, Incandescent light bulb is highest as 100. Usually you want the number to be greater than 70 for most applications, professional who works with color would require 90 or higher CRI.
* Heat Handling (Quality for product life time)
   Almost all electronic parts emits some heat, that is especially true for LED products. Lighting grade LED converts about less than 33% of energy into light; the rest would become heat. Driver does better that has only less than 20% of energy become heat. The number is better than traditional light source such as incandescent, fluorescent or HID. However, traditional light sources work at much higher temperature above 400F(200C) or higher; on this end, electronic parts usually won't be able to sustain more than 250F(120C). That's why LED lighting is more sensitive to heat. Heat can damage LED, shorten their life span, decrease light output and ruin their CRI.  Similar effect applies to driver, too.
    Thermo design is big topic in LED lighting since beginning. It's complicated and no fixed rule for user to exam products. One general rule is metal conduct heat better than most of other materials; the other rule is size counts. lots of heat trap in a small space isn't a good thing.
* Energy efficiency
    There are some room of difference in energy conversion rate among various LED products. Since lumen is measured as energy, blue light has higher lumen number than other light. LED working temperature also plays a role, too. Cooler LED does better work to convert electricity into light. Of course, circuit efficiency made few difference, too.

    All these variance doesn't compare to difference made by basic lamp design. LED by nature is directional light source, while all other light source is omnidirectional. Use LED to make a omnidirectional lamp requires mounting LED at different directions.  On the other hand, use other light sources to make a directional lamp, such as ceiling light/Wall light/ shop light, usually include reflective panel to reflect light to desired direction. But no matter how it does, there is no match to directional lamp that uses LED. in some cases, directional LED lamps use only half of energy as fluorescent ones.


Easy LED Lighting quality

Our LED module uses aluminum plate as mounting bracket, which also makes direct contact with the belly of all LEDs.  The aluminum takes heat away from LED and allow them to work at much cooler temperature.
Our LED kit or lamp uses external driver that has much durable design. It's water and dust proof and doesn't have to be crumble together LED heat source.

Monday, March 17, 2014

LED tube demystify


LED tube is a newly emerging product from China. They typically have aluminum back half tube, diffuser from tube cover, LED PCB and driver circuit. The whole thing is packed inside a narrow long tube that has less than an inch in diameter, compatible size as fluorescent tube in order to retrofit. LED tube usually use many small low power LED, typical hundreds of them. Because the distance between LED and diffuser is less than half inch, to make the light output look uniform, the distance between LEDs should be less than that too.  Depends on the design, a typical 4 foot long T8 LED tube uses 18W ~ 22 Watt of power, is less than average 32 Watt used by fluorescent tube to achieve same brightness..


Although the goal was to retrofit into existing fluorescent light fixture, there is a ballast between household AC and fluorescent tube connectors to reduce current in  fluorescent system. Install LED tubes into fluorescent fixture need to bypass this ballast, and there are two kinds of LED tube standards that's not compatible with each other. Mix use these two may cause catastrophic damage and dangerous. Therefore remove or bypass the fluorescent ballast is considered invalidation UL warranty.   

Put that aside, diver used in LED tube has to be crumple inside a tiny space that's less than half of tube. So their design is usually delicate. Since both of LED board and driver generate great deal of heat in such a close proximity, they affect each other in many aspects. There are reports about poor lifetime of driver and color degeneration of LED at near the driver.   

On the contrary, Easy LED kit or lamp use external driver with good safety and quality, and our module handles heat excellently, we believe is a much better choice than LED tubes. Easy LED kits and Lamps can be get at easyledlighting.com

Friday, March 14, 2014

Is it easy to install Easy LED kit?


My kitchen, about the size of 14x10',  has build-in ceiling light that was using fluorescent tubes. There were 4 four feet long T5 tubes that were installed inside the 11" ceiling space and were using totally 120 Watt of power when turn on.
Fluorescent tubes has a shorter life span and it was really a hassle to replace a 4 feet long glass tube. As I started this LED business, my first order was to replace this ceiling light.

This ceiling light is actually very simple with 2x2' diffuser panels. The diffuser panel can be easily push up and move to the side to reveal access space for works like replace fluorescent tubes.

To install Easy LED kit,  The first step is to remove all fluorescent tubes and find the power feed. I did not remove the old fluorescent lamp base; I just leave them in there to reduce the junk I had to remove for this project. But it's a good idea to disconnect the old ballast from power feed as the ballast would still consume a little bit of power despite tube is removed.

The second step is to install LED modules at proper locations. Our standard modules are pre-bent to 90 degrees and pre-wired. So the location of the modules are determined by wire connectivity. Handle module via its metal bracket; DO NOT touch the LED balls. Remember the LED driver need to be placed near the power feed, and the rest of modules should just follow the wires to deploy. Modules are installed flat side against ceiling so the LED are facing downward.

To install them to a clean and flat surface, we can just use its back double sided type to stick to surface, remember to push it really hard (pressure) against the surface and allow dwell time (1 hour) to let the adhesion to set before turn on the light.

On a not so clean surface such as old dry wall surface, use included screws to enhance fastening. When I install them on dry wall, I don't even need to pre-drill hole, just push it into the dry wall. And I only use one screw per module.  

Once those modules are set and wires are arranged. the next step is to connect the wiring, just follow this link to connect them.

The whole installation was very easy and didn't take much time. At end, just make sure the lights are working before we close the diffuser panels. Once that was done, just enjoy the very bright and energy efficient LED light.

I used 4 modules that consumes 60 Watt of power, which is only half as before. But then my kitchen is already the brightest room in my house.

4 modules Easy LED kit is on sale at easyledlighting.comfor less than $70


Wednesday, March 12, 2014

LED grow light project

There has been interests about using LED light to grow plants indoor. There are also question about whether our light spectrum is suitable to grow plant. To put these arguments to stop, I have conduct a test to find out all the answers. I put two strawberry plants inside a closure space of Old TV cabinet. When door closed, there is absolutely no other light can get into this cabinet, the only light source is one of our Easy LED module running at 15 Watt.

 I have a timer set to light up this cabinet 12 hours a day to simulate real sunlight also.

I did some reading about general grow light, there are article saying the light need to be above certain strength to enable plant for photosynthesis instead of respiration. Our LED module emits a lot of light for illumination, for people to see things. But there is no comparison to strength of sunlight, which some time can burn your skin, and we generally don't want that kind of light strength in our house either.

But the purpose here is to grow plant, we we can shorten the length between light source and plants. I initially set the LED module fixed at top of cabinet, which is 25" away from the plants. I use a Lux meter and got 800 lux reading. Then I use two thin strings to lower the module to 16" above the leaves, my Lux meter read 2500 lux.  Since our module is so light weight, about 2 oz, it can be easily hang at desired height.

A TV studio only need requires 1000 lux of light intensity.  2500 lux is compare-able to sunlight of a overcast day.

At shorter distance, the light is much intense, too bright for viewing with general indoor ambient light; but it's perfect for growing plant.


The project is still on going, those two strawberry have been inside the closed cabinet for over 10 days by now. By compare photos from beginning and now, I sense that both strawberry have been grow bigger, healthier, with just LED light.

10 days after project started
10 days after project started.

19 days after project started

Above photos shows 10 days/18 days after project started, the two strawberry looks bigger/taller and healthy; if the light doesn't work, these plant should be withered already.


You can order Easy LED kit at easyledlighting.com and specify LED modules to be unbent.